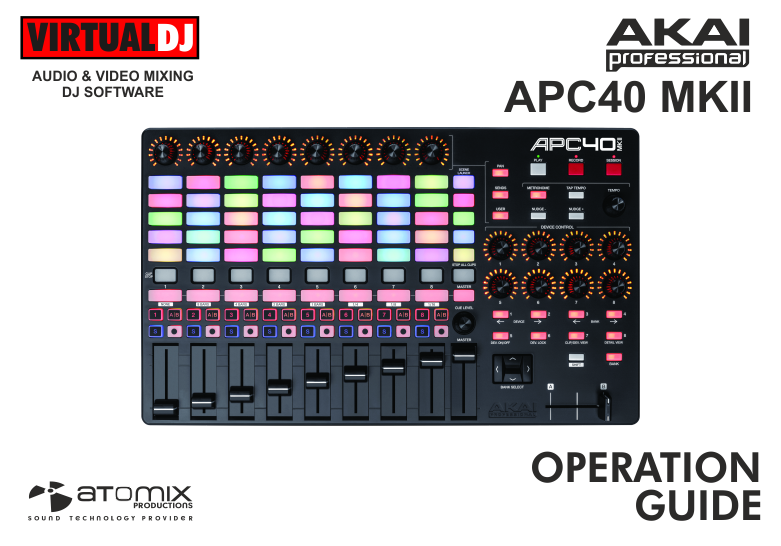
AKAI APC40 MKII
SETUP
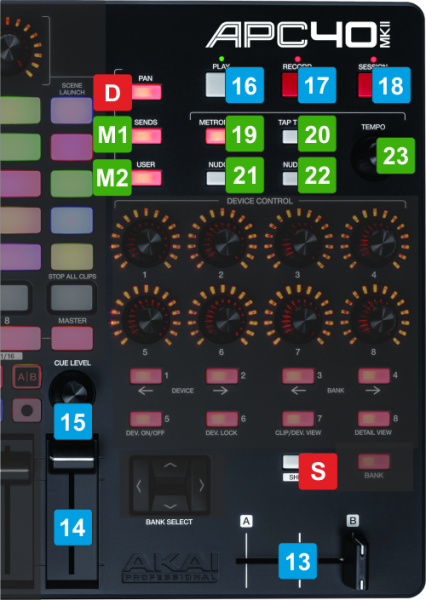
Step 1. Connections
Connect the APC40 MKII to a USB port of your computer using the provided USB cable and power on the unit from the rear-panel switch.
Step 2. Drivers
No drivers is required to be installed. The APC40 MKII is a USB class compliant device and your Operating System will install the necessary drivers.
Step 3. VirtualDJ
Start VirtualDJ and login with your Account credentials. A Pro Infinity, Pro Subscription or Plus AKAI APC40 MKII Controller License is required. http://www.virtualdj.com/buy/index.html
Detection Window
A detection window will appear when the unit is first connected with VirtualDJ, verifying proper connection.
Click to OK
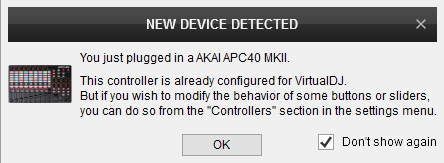
The unit is now ready to operate with VirtualDJ
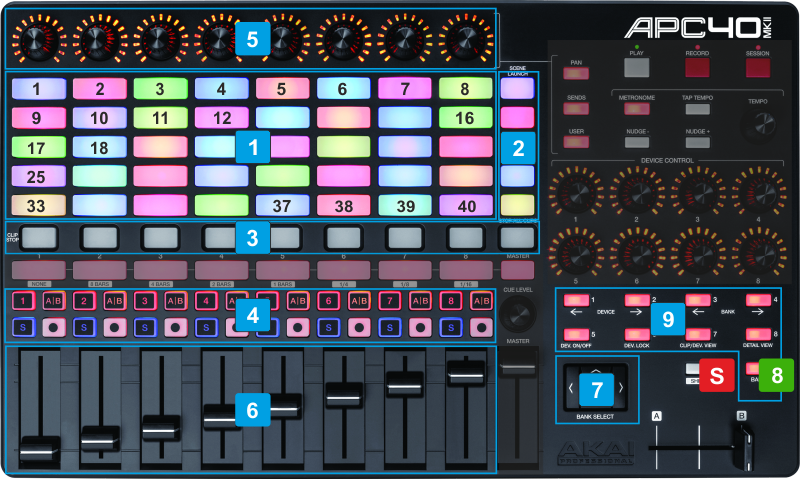
SAMPLER
KEY
ACTION
Depending on the selected Trigger mode, hold SHIFT and then use the same PAD to stop the playing Sample
The RGB leds of the PADs will automatically get the color of the Sample assigned to a slot (bright when playing and dark if not) and will be turned off if no Sample is assigned to a slot.
Use the STOP ALL CLIPS button to stop all the currently playing Samples
A|B : These buttons double the size of the Sampler Loop (if a Sample is in Loop mode) for the 8 Samples of the selected row.
S : Use these buttons to set a Sample to Loop or Drop mode for the 8 Samples of the selected row.
● : Use these buttons to record Output (Master Deck) to a new Sample and automatically save it to the Recording Bank to one of the 8 slots designated by the selected row.. If no row is selected, all 8 buttons will record Output to a new Sample and automatically stored to the Recording Sampler folder.
There is no functionality for the #,A|B and S buttons if no row is selected.
When a row is selected, adjust the Volume of each one of the 8 Samples in the selected row
RIGHT : Select the next available Sampler Bank
UP : Select the previous Trigger mode (On/Off, Hold, Stutter and Unmute)
DOWN : Select the next Trigger mode (On/Off, Hold, Stutter and Unmute)
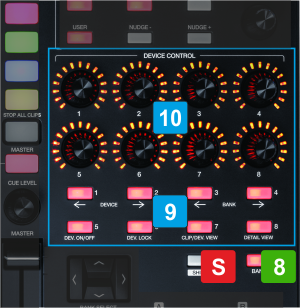
EFFECTS
This section offers Effect Controls to the selected Deck. See Other Controls chapter to see how a Deck can be selected.
KEY
ACTION
SHIFT (SECONDARY) ACTION
BUT 1 : Triggers the selected Effect
BUT 2 : Selects the previous available Effect
BUT 3 : Selects the next available Effect
BUT 5 : Triggers the 1st FX Button of the selected Effect (if available)
BUT 6 : Triggers the 2nd FX Button of the selected Effect (if available)
BUT 7 : Triggers the 3rd FX Button of the selected Effect (if available)
Multi FX mode :
BUT 1 : Triggers the selected Effect of FX Slot 1
BUT 2 : Triggers the selected Effect of FX Slot 2
BUT 3 : Triggers the selected Effect of FX Slot 3
BUT 5 : Selects the next available Effect for FX Slot 1
BUT 6 : Selects the next available Effect for FX Slot 2
BUT 7 : Selects the next available Effect for FX Slot 3
In All FX modes :
BUT 4 : Triggers the selected Video Effect on Master
BUT 8 : Enable the selected Video Transition
BUT 1 : Open the FX GUI of the selected Effect
BUT 2 : Same action as Non-Shift
BUT 3 : Same action as Non-Shift
BUT 5 : Triggers the 4th FX Button of the selected Effect (if available)
BUT 6 : Triggers the 5th FX Button of the selected Effect (if available)
BUT 7 : Triggers the 6th FX Button of the selected Effect (if available)
Multi FX mode :
BUT 1 : Open the FX GUI of the Effect in FX Slot 1
BUT 2 : Open the FX GUI of the Effect in FX Slot 2
BUT 3 : Open the FX GUI of the Effect in FX Slot 3
BUT 5 : Selects the previous Effect for FX Slot 1
BUT 6 : Selects the previous Effect for FX Slot 2
BUT 7 : Selects the previous Effect for FX Slot 3
In All FX modes :
BUT 4 : Selects the next Video Effect on Master
BUT 8 : Selects the next Video Transition
ENC 1 : Adjust the 1st Parameter of the selected Effect (if available)
ENC 2 : Adjust the 2nd Parameter of the selected Effect (if available)
ENC 3 : Adjust the 3rd Parameter of the selected Effect (if available)
ENC 4 : Adjust the 4th Parameter of the selected Effect (if available)
ENC 5 : Adjust the 5th Parameter of the selected Effect(if available)
ENC 6 : Adjust the 6th Parameter of the selected Effect (if available)
Multi FX mode :
ENC 1 : Adjust the 1st Parameter of the selected Effect in FX Slot 1
ENC 2 : Adjust the 1st Parameter of the selected Effect in FX Slot 2
ENC 3 : Adjust the 1st Parameter of the selected Effect in FX Slot 3
ENC 5 : Adjust the 2nd Parameter of the selected Effect in FX Slot 1
ENC 6 : Adjust the 2nd Parameter of the selected Effect in FX Slot 2
ENC 7 : Adjust the 2nd Parameter of the selected Effect in FX Slot 3
In All FX modes :
ENC 4 : Adjust the 1st Parameter of the selected Video Effect on Master (if available)
ENC 8 : Adjust the 1st Parameter of the selected Video Transition (if available)
In All FX modes :
ENC 4 : Adjust the 2nd Parameter of the selected Video Effect on Master (if available)
ENC 8 : Adjust the 2nd Parameter of the selected Video Transition (if available)
PADS
This section offers control for the PADS of VirtualDJ for the selected Deck. See Other Controls chapter to see how a Deck can be selected.

KEY
ACTION
SHIFT (SECONDARY) ACTION
Trigger the action assigned to Pads 1 to 8. Functionality depends on the selected Pads page. See Pads in VirtualDJ Manual for further details
In Settings Pads mode:
PADS 1-2 : Control the 1st Parameter of the selected Pad page (Leds will light up if Parameter is available)
PADS 3-4 : Control the 2nd Parameter of the selected Pad page (Leds will light up if Parameter is available)
PADS 5-6 : No functionality
PADS 7-8 : Select the previous/next available Pad page
Trigger the SHIFT action assigned to Pads 1 to 8. Functionality depends on the selected Pads page. See Pads in VirtualDJ Manual for further details
In Settings Pads mode:
Same actions as no-SHIFT
OTHER CONTROLS
KEY
ACTION
SHIFT (SECONDARY) ACTION
In Loop mode : Triggers a loop of the selected beats in size
In Tempo mode : Smoothly resets the tempo of the selected deck to its original value. The LED of this button will be on if the tempo is at the original value and will blink while it's resetting.
In Key mode : Resets the key of the selected deck to its original value. The LED of this button will be on, if the track is at the original key.
In CBG mode : Re-analyzes the track of the selected deck (re-calculates, BPM and phase)
In Loop mode : Turns Loop Roll mode on/off (LED will blink).
In Tempo mode : Selects the next available Pitch range
In Key mode : Same action without SHIFT pressed
In CBG mode : Same action without SHIFT pressed
In Loop mode : Triggers the last enabled loop (re-loop)
In Tempo mode : Synchronizes the tempo and phase of the selected deck with the opposite (or the Master-Deck if more than 2 decks are used)
In Key mode : Matches the key of the selected deck with the value of the opposite one.
In CBG mode : Press this button for more than 4 times while the selected deck is playing, to manually calculate the BPM of the track. When paused, tap once to set the current position as first-beat
In Loop mode : Same action as with no SHIFT pressed
In Tempo mode : Same action as with no SHIFT pressed
In Key mode : Same action as with no SHIFT pressed
In CBG mode : Halves the tempo of the track loaded to the selected deck.
In Loop mode : Sets the current position of the selected deck as the start of a manual loop (loop-in)
In Tempo mode : Temporary slows-down the tempo of the selected deck, while pressed.
In Key mode : Moves down the musical key of the track loaded to the selected deck, by one semitone
In CBG mode : Moves the CBG pattern to the left by 10% of a beat
In Loop mode : Moves the triggered loop of the selected deck backwards, by one beat
In Tempo mode : Same action as with no SHIFT pressed
In Key mode : No action
In CBG mode : Decreases the width of the CBG pattern (BPM) by 1%
In Loop mode : Sets the current position of the selected deck as the end of a manual loop (loop-out), creating a manual loop, or exits the loop if enabled.
In Tempo mode : Temporary speeds-up the tempo of the selected deck, while pressed.
In Key mode : Moves up the musical key of the track loaded to the selected deck, by one semitone
In CBG mode : Moves the CBG pattern to the right by 10% of a beat
In Loop mode : Moves the triggered loop of the selected deck forward, by one beat
In Tempo mode : Same action as with no SHIFT pressed
In Key mode : No action
In CBG mode : Increases the width of the CBG pattern (BPM) by 1%
In Loop mode : Adjust the length of a loop on the selected deck.
In Tempo mode : Adjust the tempo (BPM) of the selected deck
In Key mode : Navigates through the track's time on the selected deck.
In CBG mode : Navigates through the track's time on the selected deck.
In Loop mode : Moves the triggered loop of the selected deck by 20% of beat
In Tempo mode : Adjust the tempo (BPM) of the selected deck in smaller steps (0.1% per click)
In Key mode : Navigates through the track's time on the selected deck in small steps (10% of a beat)
In CBG mode : Increases the width of the CBG pattern (BPM) by 1%
